
I didn’t just test Cutout.Pro for a few minutes, I lived with it for a while inside a real content and e‑commerce workflow. What follows is exactly how it behaved when I used it to clean product catalogs, rescue bad photos, churn out headshots, and generate quick creatives, plus where it quietly got in the way.
How Cutout.Pro First Shows Up in Your Workflow
My relationship with Cutout.Pro started the same way a lot of tools do: with a small crisis.
I had a batch of product photos from a supplier different cameras, mixed lighting, random props in the background and a deadline to get everything live. Manually masking each image in a traditional editor would have taken half a day. So I dragged the whole mess into Cutout.Pro.
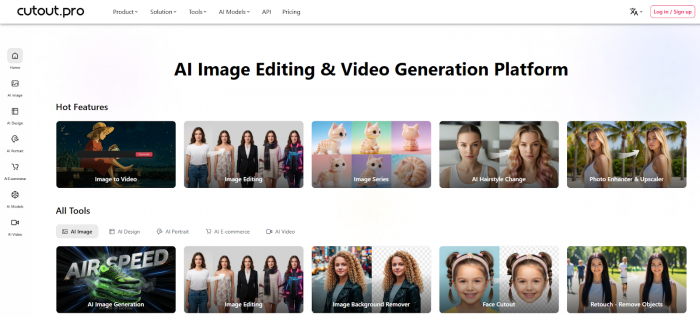
The first impression was that this isn’t just “one more background remover”. The homepage pushes background removal to the front, but once you’re inside, you see an entire shelf of tools: background removal for images and videos, enhancement, restoration, AI art, ID photos, headshots, posters, memes, even passport photos. It feels less like a single-purpose app and more like a visual utility belt that happens to be obsessed with backgrounds.
What really mattered, though, was this: could it turn that chaotic folder into clean, usable images without me losing my mind?
Background Removal: Where I Spent Most of My Time
I started with what hurts the most in day-to-day work getting clean cutouts.
My first test was a very typical scenario: a pair of sneakers on a dusty studio floor, with some cables sneaking into the frame. I dropped the image into Cutout.Pro, clicked the background removal tool, and by the time I glanced at my phone, it was done. The sneakers sat on a transparent grid, no manual selection, no fiddling.
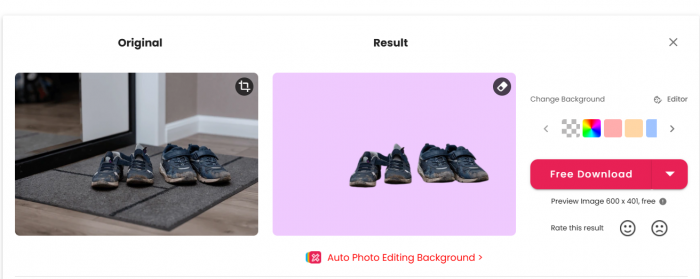
The edges looked surprisingly natural. Shoelaces, small gaps between the sole and the floor, the shadow under the shoe, those are the places where basic tools often fumble. Here, everything held together well enough that I felt confident dropping the image straight into a product page template.
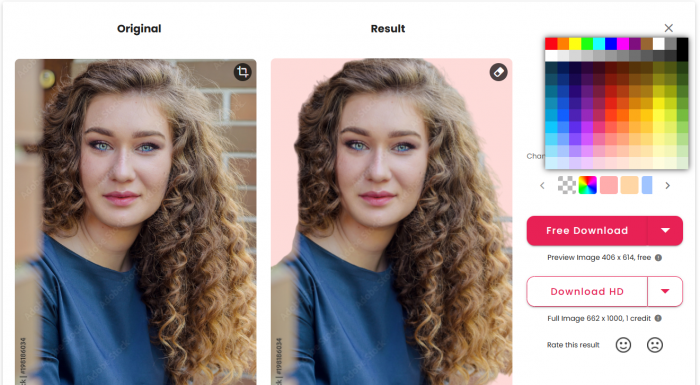
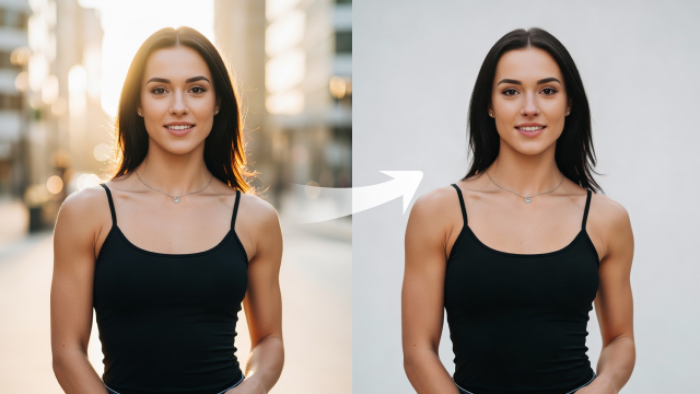
The real test for me, though, was portraits with “difficult” features. I uploaded a shot of a model with curly hair against a cluttered wall. This is exactly the type of image where I expect to see haloing and jagged outlines from automated tools. Cutout.Pro did a better job than I anticipated. Some tiny strands softened a bit, but the overall silhouette felt natural, not cut with a blunt scissor. I didn’t see the usual glow or gray fringe that screams “auto mask”.
Then I tried to break it.
I added test images with foliage, glass objects, and busy backgrounds, people in front of leafy trees, reflective product packaging, messy office desks. Here the limitations started to show. The main subject was always correctly identified and separated, but small details like leaves, transparent edges, and fine reflections were less precise. In those cases I had to spend a minute with the built‑in touch‑up brush to fix little mistakes.
The difference is that Cutout.Pro got me 90–95% of the way there in seconds. Instead of building a cutout from scratch, my job turned into quick, local clean‑ups. Over a batch of dozens or hundreds of images, that shift from “do everything manually” to “fix what the AI missed” is exactly where the time savings add up.
Video Background Removal: The Surprise Feature I Actually Used
I wasn’t expecting to use the video background remover much, but it ended up being a quiet lifesaver for social clips.
I tested it on short talking‑head videos recorded against a cluttered home office background. Normally, I’d either leave the background as it is or pull the footage into more complex software. With Cutout.Pro, I uploaded the clip, selected background removal, and watched it chew through the frames.

The result wasn’t movie‑studio perfect, but it was more than good enough for reels and social posts. Edges around hair and shoulders remained relatively stable, and the subject stood out cleanly against a new background. There were occasional tiny flickers around very busy areas, but nothing that would bother an average viewer scrolling on their phone.
If you create a lot of short video content and don’t want to bother with green screens, this is one of those quietly powerful features that you only appreciate after your third “emergency” reel.
Photo Enhancement: Fixing Images I Thought I’d Throw Away
The next rabbit hole was the enhancer.
I went through an old folder of assets the kind I would normally delete. Blurry logos pulled from old PDFs, low‑light event photos, screenshots that someone decided should be “hero images”. Instead of throwing them away, I fed them to Cutout.Pro.
On low‑res logos and icons, the upscaler did exactly what I needed: edges sharpened, text became readable, and the whole image looked less like a stretched thumbnail and more like something designed for the web. For social‑sized usage, it was instantly acceptable.

With noisy smartphone photos shot in bad lighting, I saw a clear improvement in clarity and brightness. Faces became more defined, backgrounds less muddy. If I pushed the enhancement slider too far, skin did start to look a bit overly smoothed, so I learned to stop before it crossed that line. Used thoughtfully, it gave me “we can use this on the site” quality out of shots I’d previously written off.
The most fun was resurrecting older, slightly faded photos. The combination of color correction and enhancement brought them back to life enough for blog posts and timeline content. It’s not restoration at a professional retoucher level, but for content and marketing use it was far better than I expected.
AI Headshots, Cartoons, and Quick Creatives: The “Extra Value” Layer
Once I had cleaner images, I started exploring the creative tools. My expectation was that these would be gimmicky. They weren’t.
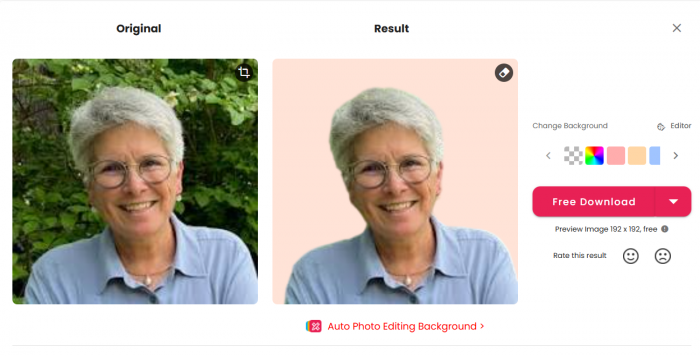
The AI headshot tool was the first one that felt genuinely practical. I uploaded a few casual portraits and let Cutout.Pro generate more professional‑looking versions. The results looked like photos someone might have taken in a simple studio setup: neutral backgrounds, balanced lighting, tidy framing. They weren’t perfect for a fashion magazine, but for LinkedIn, team pages, pitch decks, and author bios, they were more than enough.
The cartoon selfie and AI art styles are more playful, but they have a real use in brand‑building content. Turning my own portrait into a consistent cartoon style gave me assets for avatars, about pages, and social posts that felt visually cohesive without hiring an illustrator.

The poster and design generators sit somewhere between utility and magic trick. After cutting out a product or a person, I could drop the subject into ready‑made layouts, tweak a few colors and text lines, and export a finished graphic. These aren’t substitutes for a full design suite, but when someone on the team says “we just need a simple promo graphic for this week”, they become extremely handy.
What I appreciated was that these creative tools weren’t hidden behind complex settings. They behave like one‑click accelerators with just enough control to keep the results usable.
The Quiet Workhorses: Batch Processing, ID Photos, and Utilities
The less glamorous features ended up being the ones I used most consistently over time.
Batch processing changed how I think about image sets. Instead of treating each photo as a separate task, I started dumping entire folders into Cutout.Pro, running background removal or enhancement across the board, and then quickly reviewing the outputs. The vast majority of images needed no further work. The few that did were easy to spot and fix.
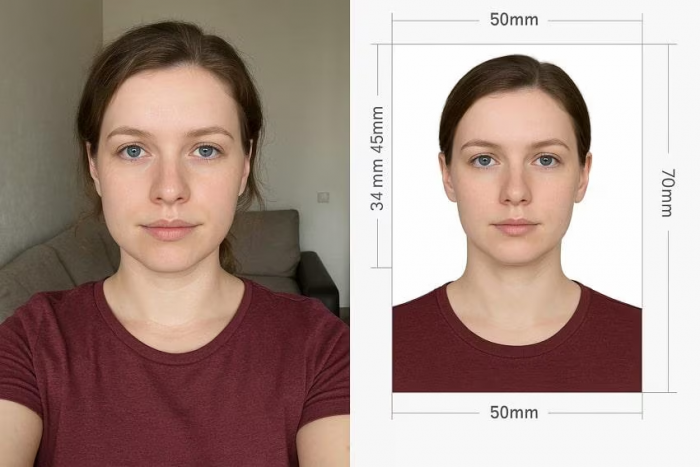
The passport and ID photo tools are almost boring in their reliability, which is exactly what you want. Upload a photo, select the country or format, and Cutout.Pro handles the cropping, alignment, and sizing. I used it to generate quick passport‑style images for internal ID cards and documentation, and it did the job without fuss.
Then there’s the developer/API side. I’m not a full‑time engineer, but I worked with one to plug Cutout.Pro’s capabilities into a small internal tool. Once the integration was set up, team members could drag files into our own interface and get the benefits of background removal without ever logging into Cutout.Pro directly. That moment when the tool fades into infrastructure instead of being a separate tab was when I realized it had earned a permanent place in the stack.
Speed and Reliability: Did It Keep Up Under Pressure?
The question I always have with cloud tools is simple: will it slow me down when I actually need it?
In day‑to‑day use, Cutout.Pro stayed fast and predictable. Single images processed in a few seconds. Larger files or batches took slightly longer but still within a window that matched my working rhythm. I never hit a moment where I felt I had to walk away from my desk because processing was taking too long.
I also didn’t encounter crashes or corrupted outputs, which matters more than people usually mention. When you’re processing 50 or 100 images in a single session, losing work to flaky tools is infuriating. Cutout.Pro, in my experience, behaved like a steady service rather than a temperamental beta.
Is it perfect on every file? No. In particularly difficult scenes - extreme lighting, dense textures, weird reflections, it still generated small artifacts. But I respected that it didn’t pretend to be magical. It got me close, and when it couldn’t, it at least failed gracefully enough that I could fix the rest myself.
Pricing From a User’s Seat: Where the Credits Feel Fair (and Where They Don’t)
The pricing model is where your relationship with Cutout.Pro either settles into trust or constant mental math.
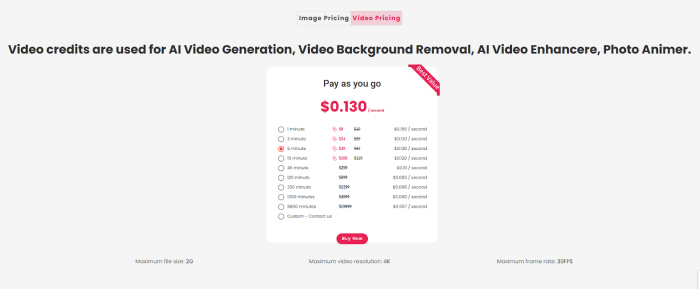
Everything revolves around credits. Each operation like processing an image for background removal costs a credit or two, depending on the complexity. Video operations cost more. You can see your balance ticking down as you work.
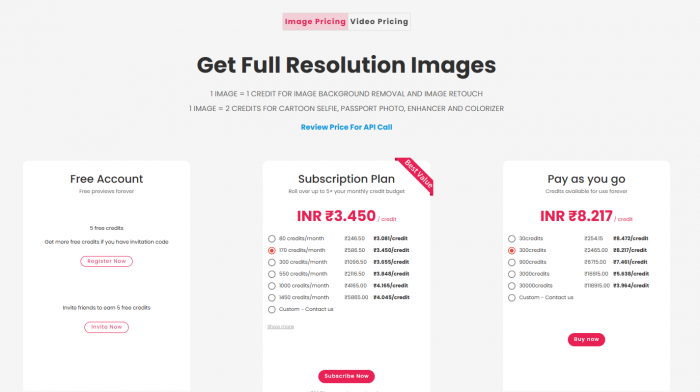
With a subscription, you get a fixed pool of credits per month. Unused credits can roll over up to a certain limit, which I found helpful during quiet periods. Pay‑as‑you‑go packs work like prepaid phone recharges: you buy a block and use it whenever you need.
From my perspective, the model feels fair if you process images regularly. When I was in a heavy workflow like new catalog, campaign batch, content refresh, the credits translated very clearly into time savings. Every credit spent was a little reminder of hours not spent manually masking or cleaning up shots.
Where it feels less friendly is for sporadic users. If you only need a handful of images processed every couple of months, it’s harder to justify a subscription, and pay‑as‑you‑go packs can feel like overkill. This is less a flaw in the tool and more a misalignment between usage pattern and pricing philosophy.
Once I accepted that Cutout.Pro is designed for active users rather than “once in a blue moon” tasks, the model made a lot more sense.
Learning Curve and Everyday UX: Could I Hand This to a Non‑Designer?
One thing I kept testing was whether I could hand Cutout.Pro to someone on the team who doesn’t live in design tools.
The answer, after a week or so, was yes.
The first session can feel like walking into a well‑stocked kitchen when you only came for a glass of water. There are a lot of options and icons on screen. But the main flows such as background removal, enhancement, headshots are presented clearly, and the UI uses plain language instead of jargon. Once someone learns where “their” tools live, they don’t have to think much about the rest.
Where the experience really clicked was in “before and after” views. The ability to visually compare the original and processed versions side by side made it easy to judge whether a result was good enough or needed tweaks. It also helped non‑designers trust the AI more quickly, they could see exactly what changed, without decoding layers or masks.
As a personal preference, I do wish there were a slightly more minimalist mode for power users who know exactly which tools they care about. But that’s a nitpick, not a deal‑breaker.
What I Liked About Cutout.Pro
The biggest benefit for me was the time it saved. The background remover worked quickly, even for large batches, so I could focus on other tasks while it processed images.
The results were usually clean enough for client-ready use, especially for product photos, social media images, and marketing visuals. It handled tricky details like hair and shoelaces better than many basic tools I’ve used.
I also liked the all-in-one platform. Being able to remove backgrounds, enhance images, create AI headshots, and generate simple posters in one place reduced the need to switch between multiple apps. Another plus was its ease of use. Even non-designers on my team were able to get good results quickly thanks to the simple interface and clear before-and-after previews.
Finally, it scaled well for different workloads, whether editing a few images or processing large batches.
Where It Fell Short (Limitations)
It’s not perfect for every image. Complex scenes like glass, reflections, dense foliage, or extreme lighting sometimes left small edge artifacts that needed manual fixes.
The credit system can also feel stressful during large projects since usage reduces your balance quickly.
The dashboard can seem a bit busy at first, though it becomes easier once you know where the main tools are. For high-end or flagship visuals, I still prefer using professional editing software after the initial cutout.
Lastly, since it’s cloud-based, you need a stable internet connection to use it.
How It Compares in My Real Stack
In my own tool stack, Cutout.Pro doesn’t exist in isolation.
For pure pixel‑perfect work like key visuals, print materials, hero banners that represent a brand at the highest level, I still lean on professional software and human retouching. There’s a level of nuance in skin, fabric, and tiny reflective details that no AI tool has fully replaced yet.
For everyday production, though product listings, social tiles, blog imagery, internal visuals, Cutout.Pro went from “nice experiment” to “default first step” quite fast. It sits nicely alongside design platforms and specialized editors rather than trying to replace them. I often use Cutout.Pro to handle the grunt work (cutouts, cleanup, basic enhancement) and then bring the results into another tool for final polish or layout.
That division of labor feels natural. The AI handles volume and repetition; humans handle taste and nuance.
Final Verdict: How It Actually Feels To Live With Cutout.Pro
After using Cutout.Pro across real projects, I stopped thinking of it as a “background remover website” and started treating it like part of my visual infrastructure.
On good days, it’s invisible: I upload, it works, I move on. On tougher days with weird source images, strict design standards, or edge‑case scenes, it becomes a collaborator that gets me most of the way there and then politely hands over control.
It is not a magic wand and it’s not a Photoshop killer. It is something more practical and, in many workflows, more valuable: a fast, reliable assistant that frees you from the repetitive, low‑level work and gives you back the time and energy to focus on ideas, campaigns, and storytelling.
If you touch a lot of images every week, you’ll feel its impact. If you only need the occasional cutout once in a while, it might feel like more power than you strictly need. But in the day‑to‑day reality of content, e‑commerce, and marketing work, Cutout.Pro earns its keep not with dramatic demos, but with how quietly it makes the boring parts disappear.
Comments